Ways in which you will possibly Destroy your Arduino!


We are not only talking about burning your Arduino Board in fire or crushing it with a hammer. But there are other method/ways to do it, that are more geeky. We know that you don't want to do it, but still these information will be helpful in order to avoid the situation, in which you would have burned/destroyed your Arduino accidentally. So don't let the smoke come out of your Arduino board, make it safe.
Arduino Mega, With Labels Indicating Pins

1: Shorting I/O Pins to Ground

Configure an I/O pin as output then set it high(Logical 1). Then short the pin to ground (GND). Now after doing that you have now created an over-current condition on the I/O pin & your arduino pin will be destroyed.

 Reason: The MCU datasheet specifies an absolute maximum per-pin current of 40mA. With a typical internal resistance that is generally 25 ohms per pin, a short to ground can produce as much as 200mA of current to flow, more than enough to destroy the MCU pin.


2: Shorting I/O Pins to Each Other

Configure 2  I/O pins to be output, then set one of them to high (logic 1) & the other one to low (Logic 0). Now connect the pins together. You have now created an over-current condition on both I/O pins & they will get destroyed.

 Reason: The MCU datasheet specifies an absolute maximum per-pin current of 40mA. With a typical internal resistance that is generally 25 ohms per pin, a short between I/O pins with +5 & 0 volts values, can produce as much as 200mA of current to flow, more than enough to destroy the MCU pin.


 3: Apply Over-voltage to I/O Pins

Apply any voltage exceeding 5.5V to any I/O pin. The I/O pin is destroyed.

 Reason: This forward-biases the ESD (electro-static discharge) protection diode built-in to the MCU. Once the voltage at the I/O pin is greater than the supply voltage (5V) by about 0.5V, the top diode starts to conduct current. This is OK for diverting a short-duration over-voltage event, like ESD (electro-static discharge), but that diode is not meant to be on all the time. It will simply burn out and stop protecting the pin. This high voltage can reach to other connected component with the MCU like USB Chip, LEDs & destroy them too.


4: Apply External Vin Power Backwards

Power your Arduino through the Vin connector pin, but with the reverse polarity of the Vin/GND power connection. This will fry up several components on the Arduino.
  
Reason: There is no reverse-voltage protection on voltages applied to the Vin connector pin. Current will flow from the GND pin of the ATmega328, through the 5V pin, back through the 5V regulator & to Vin. The same thing will happen with the ATmega8U2 MCU. Both MCUs & the 5V regulator will be destroyed.


5: Apply >5V to the 5V Connector Pin

Apply a voltage >5V to connector pin. Many components on the Arduino will be destroyed, and this voltage can also appear on your computer’s USB port, and would possibly damage it.
Reason: There is no current protection on the 5V connector pin. The voltage applied is directly connected to the ATmega328P MCU, the ATmega8U2 USB interfaceMCU , and the 5V regulator, all of which can be damaged by voltages exceeding >5V, & the resulting currents that flow.
It is a common misconception that the Arduino 5V regulator will ensure that the 5V voltage remains at 5V, no matter what. IT WILL NOT! The only thing the 5V regulator can do is control current coming from the USB port or the external DC power jack. If the current is coming from an external power source directly connected to the 5V connector pin, the regulator can do nothing about it. Another consequence of applying more than 5V to the 5V connector pin is possible damage to the PC’s USB port. If the Arduino is powered from USB then this excessive voltage can cause current to flow backwards through the voltage-switching MOSFET T1 and back to the PC’s USB port.


6: Apply >3.3V to the 3.3V Connector Pin

 Apply a voltage of 3.6V or higher to the 3.3V connector pin. Any 3.3V shields plugged in, or other devices powered from this pin, will be destroyed. If at least 9V is applied, this voltage can destroy the Arduino 3.3V regulator and also feed current back into the PC’s USB port.

 Reason: The 3.3V connector pin has no protection circuitry. This voltage is directly connected to the Arduino 3.3V regulator and any other shields or devices that are powered by this connector pin. If the voltage exceeds 9V, the 3.3V regulator will be destroyed and may allow current to flow backwards to the 5V node, and then backwards further to the PC’s USB port. The excessive voltage will also destroy the two devices connected to the 5V node: the ATmega328P and ATmega8U2 microcontrollers.


7: Short Vin to GND

Power the Arduino from the DC power jack and short the Vin connector pin to GND. The Arduino blocking diode will be destroyed and traces on the Arduino PCB may melt and be destroyed.
  Reason: There is no current limit protection on the Vin connector pin. A short circuit from Vin to GND effectively short circuits the DC power jack input, and exceeds the current rating of the blocking diode.
The amount of current that flows is limited only by the resistance of the Arduino PCB traces and the current capability of the power supply. If this is high enough, the diode D1 will be destroyed and PCB traces may melt due to the heat caused by this large current.  


8: Apply 5V External Power with Vin Load

If you are powering the board from 5V applied to the 5V connector pin and you have circuitry connected to the Vin pin (or have shorted Vin to GND) then current will flow backwards through the 5V regulator and destroy it.

 Reason: There is no reverse voltage protection on the 5V regulator thus current can flow from the 5V connector pin, backwards through the regulator, and to whatever is connected to Vin.


9: Apply >13V to the Reset Pin

Apply >13V to the Reset connector pin. The ATmega328P microcontroller will be damaged.
Reason: The Reset connector pin is directly connected to the reset pin on the ATmega328P. While this pin tolerates 13V, higher voltages will damage the device.


10: Exceed Total Microcontroller Current

Configure at least 10 I/O pins to be high and draw 20mA from each one (for example, by lighting 10 LED’s). You have now exceeded the total supply current rating for the microcontroller and it will be damaged.
Reason: It’s not enough to limit the current of each I/O pin -- the total current sourced from all I/O pins must not exceed 200mA, according to the ATmega328P datasheet.


11: Changing Connections While Powered Up

You should always avoid doing that. Otherwise it can burn that pin, in which a device is connected or even the whole board setup!

 Reason: If a device is drawing current for the microcontroller's pins, and if we remove the wire from it. This will result in creation of back EMF (Due to circuit breaking action). This back emf will be of very large value if done very fast. So this can burn that pin.


12: Not Using FlyBack Diodes With Inductive Components Like motors, solenoids & relays

Use any of the inductive load, without Fly-back diodes. A condition can arise that a large back current will flow for the components, to the microcontroller pin. Ultimately destroying it.

Reason: Inductive load can produce back EMF of a very large value, thus will result in a very large current that can destroy the pic to which it is connected. The diode will make it sure to make itself in Reversed-Biased mode, whenever it happens. So a large current will be avoided.


At Last Some Other (uncommon but funny) ways to destroy your Arduino (Please Do not attempt at home):

  • # Attach it to a model rocket or fireworks exhaust
  • # Put it in a pool
  • # Hit it with a sledgehammer
  • # Through it off a cliff
  • # Light it on fire (assuming you douse it in gasoline first)
  • # Hook it up to AC mains
  • # Put it out in the rain with a huge metal pole that will attract lightning and get it wet

At Last: If you double check your connections and don't do anything stupid like don't use a resistor when you should, then you should be fine. Plus, if you don't know if it will damage your board, you can pick up a cheap Arduino clone on eBay to test it out and then transfer (if you want to use the official board because... well you want to support the foundation and/or you like the name brand boards.)
Good luck not damaging your board!

 Part (top 10 pts.) Of the article was taken form http://ruggedcircuits.com, who have came with a Arduino which can withstand the first 10 conditions (Ruggeduino). And there are still many ways that can destroy your arduino, do comment below if you know one of them, so that can be added in the article itself & let the world know about it.

1 comments:

Starting MATLAB without GUI through Command Prompt/LxTERMINAL, Useful When Remote Access is needed

There are various ways to start MATLAB without GUI. This mode will be useful particularly for the remote access of the software.

1st way:
Open your "command prompt" and type in "matlab -nodesktop"
-nodesktop will behave differently depending on Windows vs Linux or Mac.
In windows it will look like as:-
matlab nodesktop mode in windows, without gui
 Whereas in Linux it will look like as:-
matlab nodesktop mode in Linux
In this mode, you still have full access to various windows available in MATLAB, and you can bring up pieces of those by commands like "edit" and "figure". You can launch the full desktop with the command "desktop", but doing this puts control with the regular command window.

2nd way: 
Open your "command prompt" and type in "matlab -noawt"
It loads Java (thus enabling Java I/O, data structures etc.) and just prevents Java GUI.
This mode looks the same as the previous one "matlab -nodesktop"

3rd way:
Open your "command prompt" and type in "matlab -nojvm"
It stops loading the of "Java Virtual Machine" (JVM), if java is necessary for your application, try the previous command, "matlab -noawt"
This mode looks the same as the previous one "matlab -nodesktop" & "matlab -nojvm"

4th way:
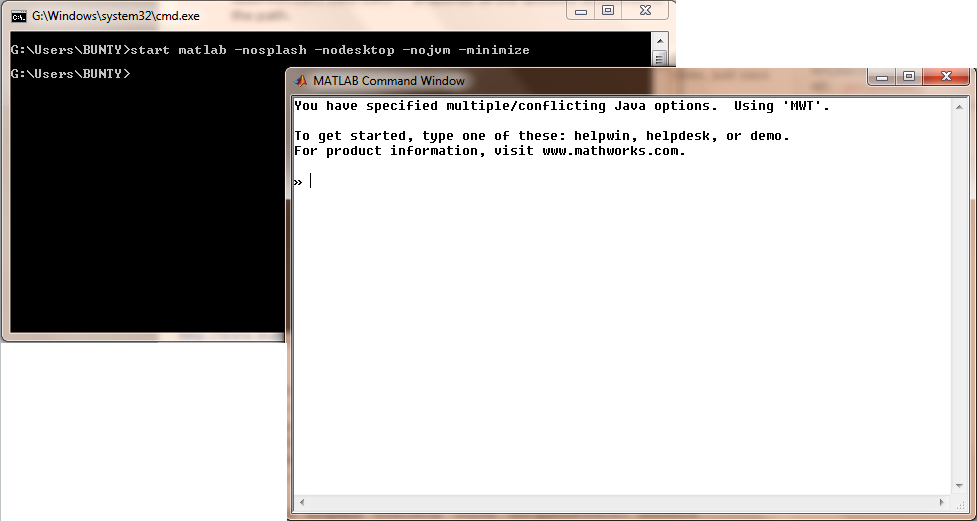
Open your "command prompt" and type in "start matlab -nosplash -nodesktop -nojvm -minimize"
 You can attach various parameters along with "nodesktop", "nojvm" etc. that will specifically depends upon your needs.
start matlab -nosplash -nodesktop -nojvm -minimize
The result of "start matlab -nosplash -nodesktop -nojvm -minimize"

0 comments:

Some MATLAB Unusual Commands, That You Must Know ( Just For Fun! ) Part 2

Yes, MATLAB is also having sense of HUMOR. And, there are many commands in MATLAB, that their programmer left for the users to find, that may be to fulfill their need of enjoyment. Yes, they also know & would have felt while programming the MATLAB software, that sometime programming becomes really creepy & its very hectic for the programmer to get it through. If the desired result is not coming, programmers tends to get frustrated by seeing that. So in their language, they have left many "Ester Eggs" in MATLAB, that a user can try. They may belongs to the category given below:
  • Unexpected but intentional behavior
  • Special things that the programmers left for us to discover
  • Extra code inside a function that can be used for other purposes
  • Hidden pictures and audio clips
So let us also try few of them:- (this is the continuation of the previous part)

13. x=[-2:.001:2],y=(sqrt(cos(x)).*cos(200*x)+sqrt(abs(x))-0.7).*(4-x.*x).^0.01,plot(x,y);
Just copy & paste above command, & you will see that a "heart shaped" waveform is plotted.
MATLAB Heart plotting Command

14. "eml_asteroids" command:
Have you ever played the good old Asteroid game? Yes MATLAB has it inbuilt to kill your boredom, just type "eml_asteroids" and it will come in front of you, PLAY n ENJOY! You will be the master of your ship & you have to kill the asteroid, shooting is done through "spacebar".
MATLAB fixed point version of the classic Asteroids game.The classic Asteroids game. Even though it is purely fictitious (and not even physically correct), it is nevertheless a complicated dynamic system including collisions, rotating polygons and gaming logic.
matlab "eml_asteroids" command

15. "eml_fire" command:
Its a command that will open a simulink model & a simulation of virtual fire will be started.
matlab "eml_fire" command

16. "fifteen" command:
It will open up a sliding puzzle of fifteen squares and sixteen slots.
matlab "fifteen" command

17. "knot" command:
Knot command will open up a 3-D knot in front of us.
matlab "knot" command

18. "life" command:
MATLAB's version of Conway's Game of Life. "Life" is a cellular automaton invented by John    Conway that involves live and dead cells in a rectangular, two-dimensional universe. In MATLAB, the universe is a sparse matrix that is initially all zero.
Whether cells stay alive, die, or generate new cells depends upon how many of their eight possible neighbors are alive. By using sparse matrices, the calculations required become astonishingly simple. We use periodic (torus) boundary conditions at the edges of the universe. Pressing the "Start" button  automatically seeds this universe with several small random communities. Some will succeed and some will fail.
matlab "life" command

19. "lorenz" command:
 Plot the orbit around the Lorenz chaotic attractor. As the integration proceeds you will see a point moving around in a curious orbit in 3-D space known as a strange attractor.
matlab "lorenz" command

20. "sf_tictacflow" command:
Ever played Tic Tac Toe, here is the MATLAB's version of the same. Just type in "sf_tictacflow", and play!
matlab "sf_tictacflow" command

21. "spy" command:
This command will show up you an interesting picture & that will actually depend upon the MATLAB's version you are using, in the older versions it used to display comic spy like creature & in 2012 version and onwards it is displaying the sketch of a dog. So try and find!
matlab "spy" command

22. "xpbombs" command:
Play the minesweeper game in MATLAB's style. There are 13 bombs hidden in the mine field. Try to flag them and uncover all of the other spaces without getting blown up. In each non-bomb square is printed the number of adjacent squares which contain bombs. In our case we lost, try to win!

matlab "xpbombs" command

23. "xpquad" command:
Its the Superquadrics plotting demonstration by MATLAB. The shapes are defined by two parameters, known as  vertical roundness and horizontal roundness. These two parameters are,  controlled by the sliders.  By adjusting these parameters, you can make a cube, a sphere, a cylinder, and dozens of curious generalized ellipsoids.
matlab "xpquad" command

24. "xpsound" command:
Demonstrate MATLAB's sound capability.  
You may view the audio graphically in three ways:
# The time sequence is a 2D plot of the data as a function of time.
# In the PSD form.
# In the spectrogram view.
matlab "xpsound" command

9 comments:

Some MATLAB Unusual Commands, That You Must Know ( Just For Fun! ) Part 1

Yes, MATLAB is also having sense of HUMOR. And, there are many commands in MATLAB, that their programmer left for the users to find, that may be to fulfill their need of enjoyment. Yes, they also know & would have felt while programming the MATLAB software, that sometime programming becomes really creepy & its very hectic for the programmer to get it through. If the desired result is not coming, programmers tends to get frustrated by seeing that. So in their language, they have left many "Ester Eggs" in MATLAB, that a user can try. They may belongs to the category given below:
  • Unexpected but intentional behavior
  • Special things that the programmers left for us to discover
  • Extra code inside a function that can be used for other purposes
  • Hidden pictures and audio clips

So let us also try few of them:-

1. The winning Sound!

%the command set is%
load handel ;
sound(y,Fs);

Matlab comes with a great sound clip for those moments when you find a solution for a huge problem. Seriously, you can try this in your codes, that just before it stops execution the sound will be played, & a great aesthetic value will be added to your project, with a sense of humor. 

2. "why" command
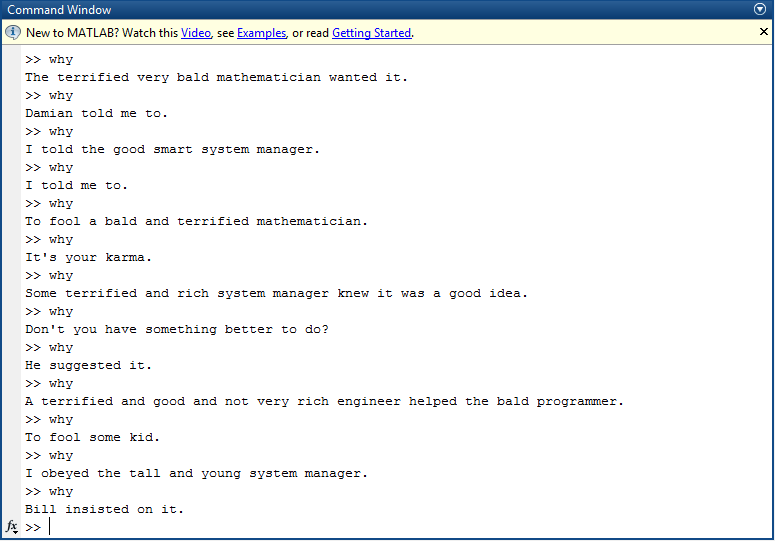
Ever asked yourself "why"? When you are getting bored of programming or when your output is not coming as you have desired, you can ask yourself or even MATLAB the question "why"! So here is the screen shot when we asked MATLAB software a series of "why"s. Its unusual isn't it?
Provides succinct answers to almost any question. why, by itself, provides a random answer.
MATLAB "why" command
3."image" command:
We might have used many image related commands, like imread, imshow etc. But have you tried "image" command? Yes, just type in image  in the command window of MATLAB without any parameter, & you will see an inverted child's image.
MATLAB "image" command
4. "imagesAndVideo" command:
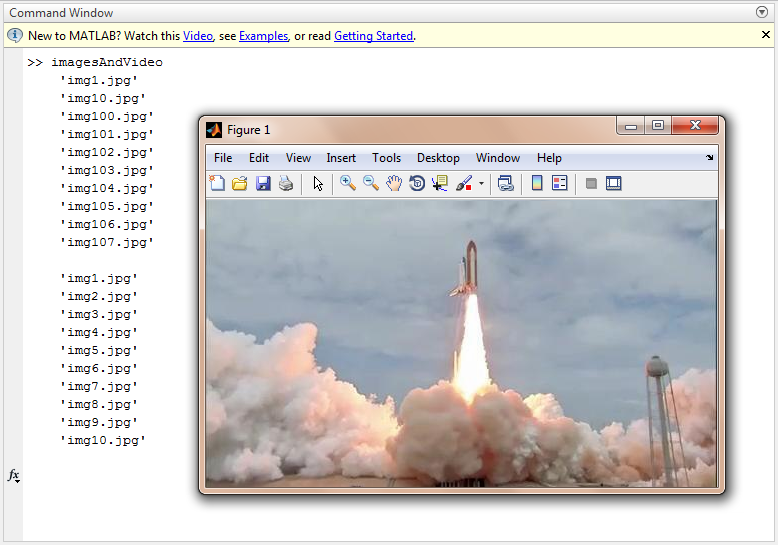
This command will show up you the video of shuttle space launch, that will be loaded without sound. Actually when you are using this command a set of images will be loaded, & that will be played in sequence, giving a simulation of the space shuttle launch.
It Convert Between Image Sequences and Video .
"imagesAndVideo" command
5. "logo" command:
As suggested by the command's name itself, it will show MATLAB's logo in a new figure.
It Plots the L-shaped membrane logo with MATLAB(R) lighting.
matlab's logo command
6. "cruller" command:
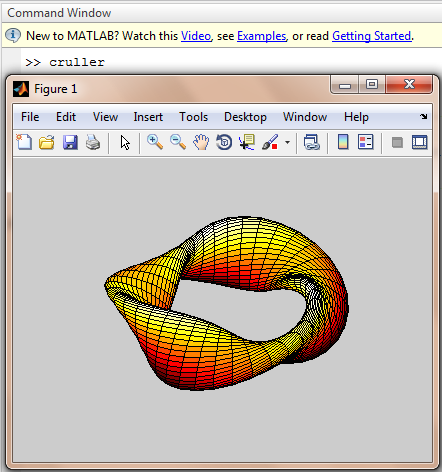
This command will fetch you a 3-D shape, that is rotatable ( Just use the hand tool ).
 This example shows how to construct a cruller by revolving the eccentric ellipse defined by the function XYCRULL.
Matlab's cruller command
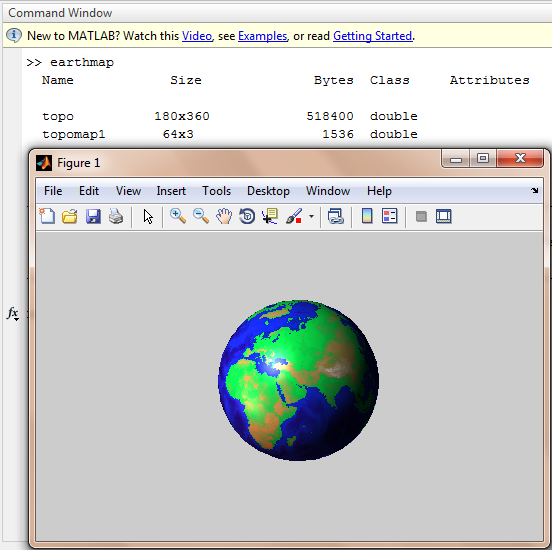
7. "earthmap" command:
This command will show up the earth map, that is also rotatable. (Just use the hand tool from the toolbox).  This example shows several ways to represent the Earth's topography.
Matlab's "earthmap" command
8. "eigshow" command:
This command presents before you the, Graphical demonstration of eigenvalues and singular values.
A pushbutton allows the choice of "eig" mode or "svd" mode.
Matlab's "eigshow" command
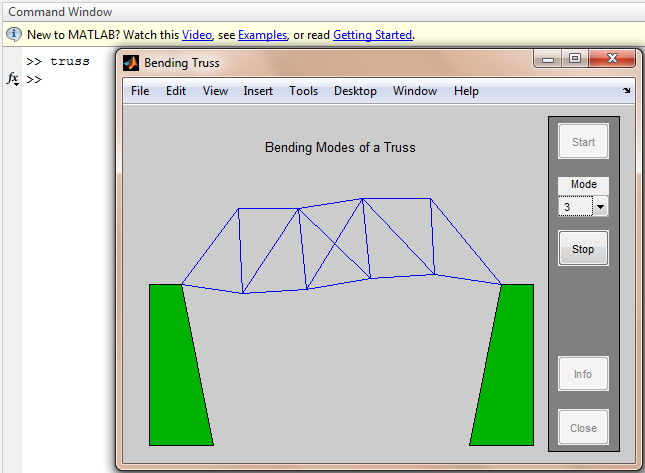
9. "truss" command: Animation of a bending bridge truss.  This demo animates 12 natural bending modes of a two-dimensional truss. These bending modes are the results of eigenvalue analysis. They have been ordered by natural frequency, with one being the slowest (and easiest to excite) mode and 12 being the fastest.  
 Matlab's "truss" command:
10. "vibes" command:
This demonstration solves the wave equation for the vibrations of an L-shaped membrane.  The solution is expressed as a linear combination, with time-dependent coefficients, of two-dimensional spatial eigenfunctions.  The eigenfunctions are computed during  initialization by the function MEMBRANE.  The first of these  eigenfunctions, the fundamental mode, is the MathWorks logo.
Matlab's "vibes" command:
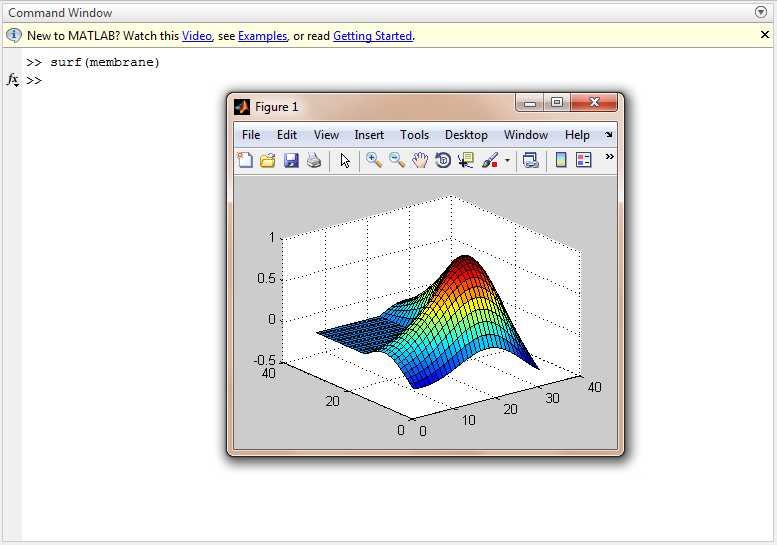
11. "surf" command:
 It returns a handle to a surface plot object. It gives the topographical view of MATLAB's logo.
Matlab's "surf" command
12. "wrldtrv" command:
Show great circle flight routes around the globe. Use the popup menus to select your city of origin and your city of destination. Then by pushing the "Fly" button, you can watch an animation of the flight between the two cities. The distance between the two cities is also   calculated. Use the "W. Hemisphere" and "E. Hemisphere" radio buttons to choose which hemisphere you want to view.
Matlab's "wrldtrv" command

Click Here for next part.

0 comments:

Controlling Mouse Pointer/Cursor Using MATLAB Code

CODE:-
clc;
clear all;
import java.awt.Robot;
vks = Robot;
vks.mouseMove(0,0);
s_size = get(0, 'screensize');
a_ratio = s_size(3)/s_size(4);
for i = 1:s_size(4)
vks.mouseMove(a_ratio*i, i);
pause(0.01);
end

Line By Line Explanation Of Above Code:-

# clc; --> It wll clear the Command Window

# clear all;--> It will clear all the variable present in the memory that time

# import java.awt.Robot;--> It will import java.awt's Robot class.

Package java.awt Description:- Contains all of the classes for creating user interfaces and for painting graphics and images. A user interface object such as a button or a scrollbar is called, in AWT terminology, a component. The Component class is the root of all AWT components. Some components of it shoots events when a user interacts with the components. The AWTEvent class and its subclasses are used to represent the events that AWT components can shoot.


# vks=Robot; --> assigning the value of imported Robot module of java.awt package to variable names vks 


# vks.mouseMove(0,0); --> utilizing mouseMove() function of class Robot to move the mouse cursor at (0,0) screen location


# s_size = get(0, 'screensize'); --> get() function will return the current system's screen size & get stored in s_size variable.


# a_ratio = s_size(3)/s_size(4);--> the s_size variable will contain a 1x4 matrix, of whose the 1st 2 variables are 1 & 1. The next two entries will give the width & height respectively. In our case s_size contains [1,1,1366,768], which may differ in your case.


# for i = 1:s_size(4) --> here you notice there is no ';' (semicolon), in loops we avoid that. Since if we do that, it will not have any effect in successive lines. The value of 'i'  will vary from 1 to s_size(4)


# vks.mouseMove(a_ratio*i, i); --> this will set the pointer location at the coordinates (a_ratio*i,i), for each value of 'i'.


# pause(0.01); --> this will set the delay interval of 0.01 seconds between the mouse pointer placement in different different locations.


# end--> it will end the for loop.


## The result of this program will be, mouse pointer will move diagonally from top right corner and end up at bottom left corner of the computer screen.

1 comments: